There is a big difference between taking and making photographs. By just pressing shutter button you just take a picture. but making images is a lot more than just pressing shutter button.
it a process that has to be learned.
So what is the key to make a better bird photograph? do you think, having better camera and lenses will make you capture better photographs?? or a beautiful bird will help you make lovely images.??
Friends, Bird photography is much celebrated as well as challenging part of wild photography. by using right technique and with little bit of practice you can drastically Improve your bird photography.
here are some bird photography tips for beginners
1-: RECOMMENDED EQUIPMENT FOR BIRD PHOTOGRAPHY :
Birds are known to be shy and they won’t let you come close. so what is the alternate way to get close to those feathery friends??, yes you are right, we need a camera with long zoom capability or DSLR with telephoto lens.
now a question arrives, what focal length is good enough?? well there is no particular focal length that fit every occasion. some time you may find 200mm enough and at some occasion even 600mm or 800mm won’t be sufficient. but for a beginner 300mm is good point to start.
there are two type of lenses, prime and zoom.
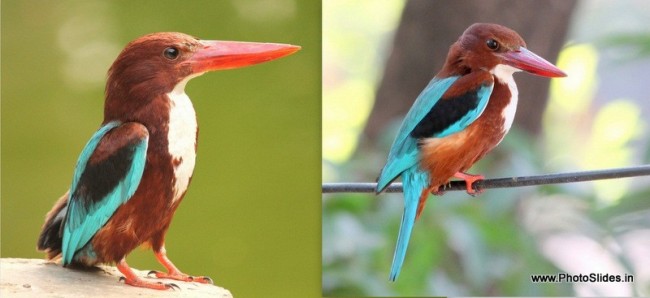
- Primes are single or fixed focal length lens. you can find it in various focal lengths. Example Canon/Nikon 50mm f/1.8 Canon EF 300mm f/4L IS USM or Nikon AF-S Nikkor 300mm F/4.0 D IF-ED. prime lenses very fast in auto focusing and costlier than zoom lenses but very good for bird photography.
- Zoom lenses have a range of focal lengths like 18-55mm or 70-300mm or 100-400mm. these lenses gives you flexibility to capture images at any focal length between the given range. for example with 70-300mm lens you can capture image at any focal length ranging from 70mm to 300mm. but these lenses are comparatively slow in auto focusing. they are less costlier than prime lenses.
A DSLR, even an entry level DSLR will do, with a Prime lens(if can afford one) is recommended but if you have, let say Nikon D3100+70-300MM or Canon 1100D+70-300MM, you are good to go. with compact cameras bird photography is little bit difficult because of its slow focusing.
2-: KNOW YOUR SUBJECT:
Its good to do some study about your subject like what kind of bird you can expect at the place you are going to, their habits and behavior. knowing your birds is very important. if you know the about the birds habit and their habitat, will help you to easily find the bird. having knowledge of their habits you can anticipate their behavior that what will be the next move of the bird. if you want to capture mating display of a peacock then you must have knowledge about their habitat and their mating season. to photograph migratory birds you must know understand their travel/migration pattern.
3-: BE PATIENT AND AVOID SUDDEN MOVEMENTS:

Spending time with bird will help you earning the trust of the bird. it will make the bird think that you are not threat for her. Do not make any sudden movement, even slightest movement or noise may scare the bird away. Do not rush toward the birds, let the bird be comfortable with you. bird will eventually come close if don’t make any sudden movement and stay calm and patient.
- Observe the location: it good idea to survey the location that you think can provide better photo opportunity. make a note where the birds are showing up most and what direction they are flying. it will help you to decide where to set up your camera.
- Getting-up early: birds most active in early morning. get up before sun rise. set your self for the angle that suits you better at the place you examined lately.
4-: USE FASTER SHUTTER SPEED:
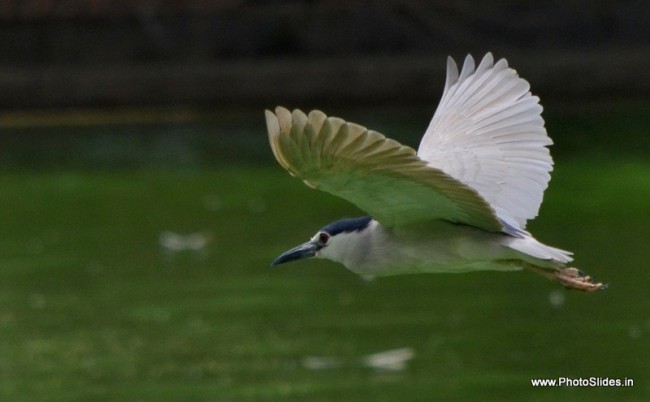
birds are known to be hyper active specially smaller one. they just don’t sit at one place. slow shutter speed can result into blurry images. using faster shutter speed you will be able to freeze the action and get sharper image. To avoid blur try shooting 1/500s or above. faster the shutter speed, higher the chance of getting sharp images. Some time light do not permit to use fast shutter speed. what to do if day is overcast day?? Well there are few thing you can try.
- USE HIGH ISO: Bumping up ISO increases camera sensor’s sensitivity to the light. This way is way sensor requires less light to create an image. In lower end DSLRs you can boost ISO 800 without much noise. If required don’t be afraid to use ISO 1600 or above. Trust me Noisy images are always better than blurry images. You can also use noise removal tools like Neat Image or Noise Ninja to reduce noise.
- USE WIDE APERTURE: using widest aperture(Wider opening of lens) allow more light to travel in. wider the aperture, shallower the Depth of Field. Shallow the Depth of Field can cause your bird to partially out of focus.
5-: USE CONTINUOUS SHOOTING MODE:

it’s also called burst mode. it let you capture multiple images in gives time frame. basic to mid range DSLRs can shoot 3 to 8 frame per second. suppose if you feel that bird is about to take off. just focus and fire and you will have sequence of images like in picture above. higher frame rate is better. it boosts the chance of getting perfect photo.
- CONTINUOUS AUTO-FOCUS : if you are capture in flight shot, you can continuous auto-focus, which is called AI Servo AF (Canon)/AF-C (Nikon). Very useful for tracking flying birds. It predicts the position of bird and focuses in advance, also called predictive auto-focus.
6-: ALWAYS BE READY:
Be ready for action, keep your gears ready. Nature is known to be very predictive. Anything can happen at any time and it doesn’t last long. keep focus on nearby object where you think that a bird may appear. this way you can gain faster focus. Camera will not have to hunt for object to focus on.
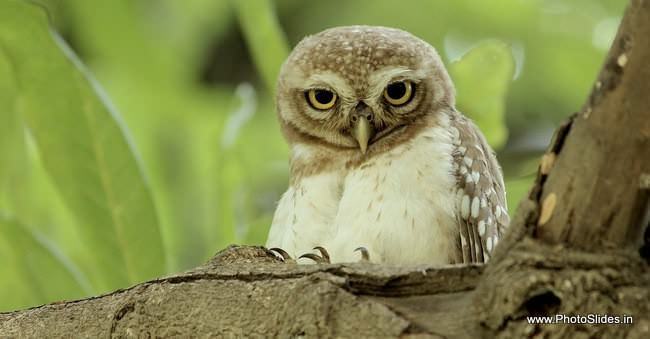
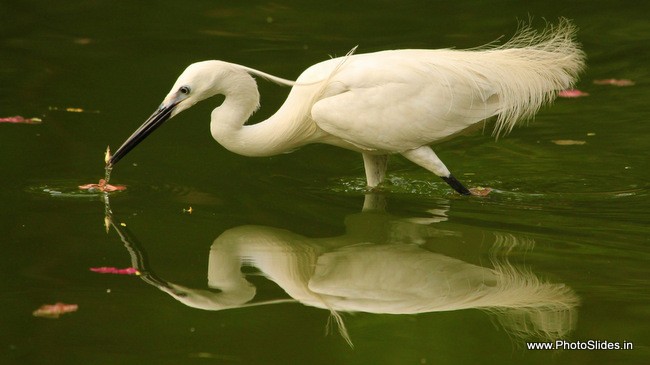
7-: GET BIRD’S EYES SHARP:

- FOCUS ON EYES: Bird photos look most attractive when eyes are sharp. Out of focus eyes make you feel that something is missing in this image. It is very much important to get sharp eyes specially when bird close-ups. This applies on birds sitting still. Using single AF point you can precisely focus on eyes. I DSLRs you have multiple AF points. You can move and select any AF point that suits your composition. If using middle AF point, what you can do is, focus on eyes by pressing shutter button half and move your camera to recompose the image.
- CATCH LIGHT: catch light is basically reflection of light source in birds eyes. Try getting some reflection in eyes. It can bring life to the image.
8-: CONSIDER THE BACKGROUND :
 Background can make or break the image. Getting clean and smooth background make bird stand out and gets full attention viewer. Getting a nice out of focus background is not always possible. It depends on where the bird is sitting and how far that background is from the bird. Farther the Background, the more out of focus it will be.
To achieve that you can try following.
- CHANGE SHOOTING ANGLE: some time slight change in shooting angle can give rather nice background. If the bird comfortable with your presence, you move to your left or right to get the best available background.
- USE WIDE APERTURE: using wide aperture(small F-Number) results in shallow depth of field.Wider the aperture, the more out of focus background will be. But this comes with a cost. Shallower depth of field can make subject partially out of focus. For example if you are focusing on the middle body of a bird as it’s not always possible to focus on eyes as said above, the farthest and the nearest part from the focus point can go soft. I will not be as crisp as the middle part.
9-: TRY SHOOTING AT EYE LEVEL:
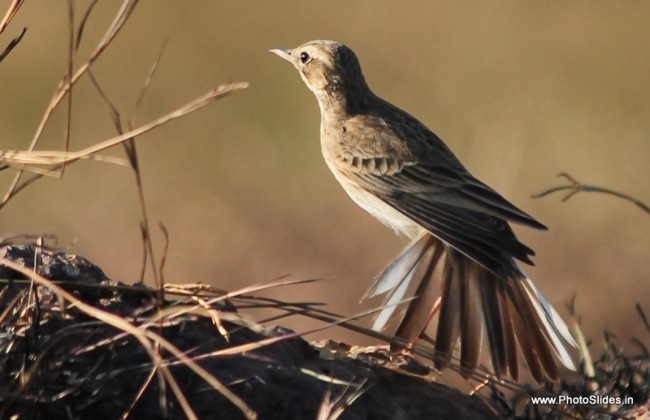 It means your camera should at or near the level of your subjects eyes. Shooting at eye level can dramatically improve the quality of image. For bird sitting on the ground, you take picture by laying flat on the ground. Shooting upward or downward lacks intimacy in images. It also gives beautifully blurred and out of focus background. if bird is above you, nothing much can be done. For shore birds and ground dwelling birds, it is recommended to shoot at eye level or low angle. This applies to other animals also.
10-: CAPTURE ACTION & BEHAVIOR:
Few year ago, it was very difficult capture action shot or flight shot with manual focus. But fortunately technology has made it easy with fast auto focus system. Try catching them doing something like flying, preening, fighting and preying, mating or eating etc. this kind of shots have story in them.
11-: Do not wear bright color:
Its recommended to wear color that matches the surroundings. use blind if available. be the part of surrounding.
